Have you seen those adorable cone shaped trees that people are buying up all over the place? Have you seen the prices? Yeah me too. So I went the DIY route and I think they turned out pretty darn adorable! Check out these easy DIY Cone Trees!

In the last few months, I have decided it is time to take control of my tacky and unorganized decorations in my house and try to really add my style and flair. One of those areas I have been working on is our beautiful mantle area. Normally I just keep it simple but in the last few months, I have been using this centerpiece of our house to really showcase various holidays and things that make me happy. The picture above really does not do these justice, they are so vibrant and beautiful and fit the whimsical feeling of Christmas in our house!
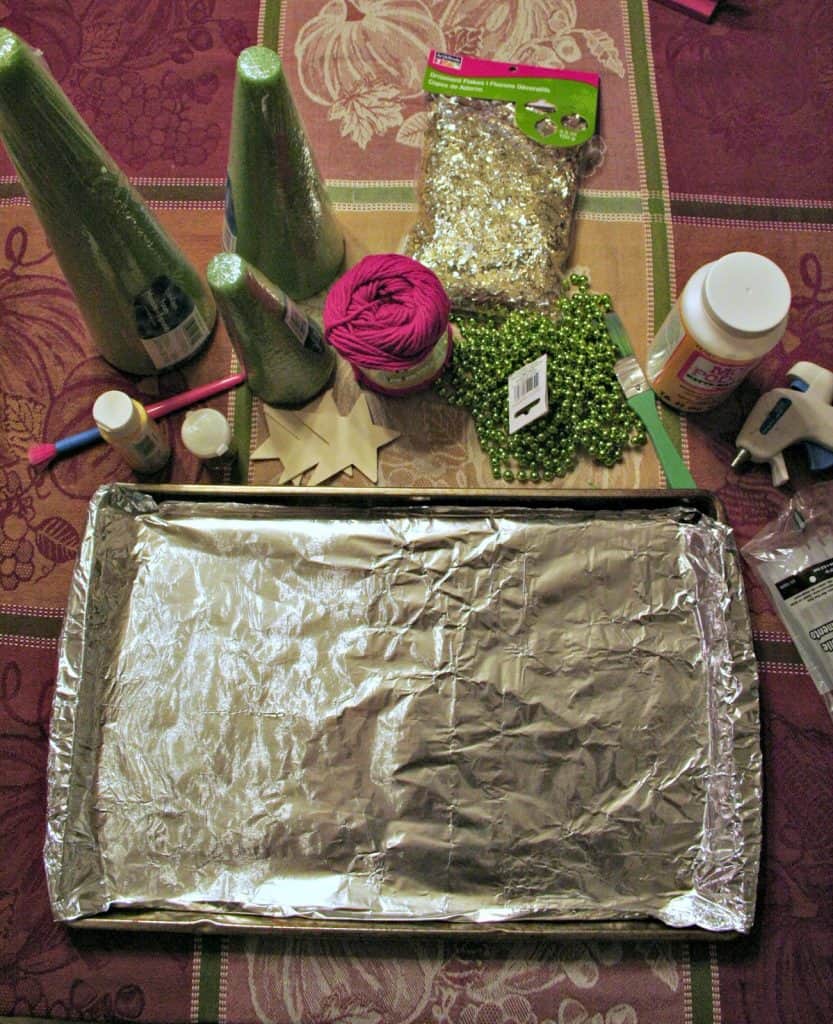
Supplies:
- Area to work on (tin pan)
- 3 different shaped foam cones
- 3 wooden stars
- 18 ft of beads
- Bag of glitter chips
- Roll of yarn
- Mod podge
- Hot glue gun and glue sticks
- Paint brush
- Glitter

Tree 1: Glitter Chip Tree
- Put the cone on the tray
- Use the paint brush and apply a generous coat of Mod Podge to the entire cone.
- Pour the glitter chips into the pan and then roll your cone in the chips. (The coverage is not perfect and you will have holes). Allow to dry for about 20 minutes
- Use the hot glue gun and fill in the holes that you did not get covered when you rolled.

Trees 2 & 3: Beads & Yarn
- Using hot glue, secure the beads to the bottom of the cone and then continue wrapping and using hot glue to secure the beads all the way around.
- When you reach the point you can try to maneuver the beads into a point or you can just glue them to the top. Either way it will look great
- Do the same for the yarn, except wrap all the way to the top and then secure at the top and then wrap all the way back down to the base to fill in any holes and add texture.
Stars:
- I just laid the stars out on cardboard and then covered them in mod podge and then sprinkled glitter on them. I let that dry and then flipped them and did the same to the other side.
- I then used hot glue to secure them to the tops of the trees.

They fit in with my mantle decor perfectly!
Like it? PIN IT, SHARE IT!


