New to Cricut and wondering how to use Infusible Ink? Check out this step by step tutorial with easy images and explanations to design your dreams!
Disclosure: I am partnering with Cricut. All opinions are my own.


What is Infusible Ink?
When infusible ink first hit the market, I had no idea how it differed from regular iron on vinyl and why it was so cool. I learned quickly that infusible ink was a fantastic material with a massive range of project possibilities. It is similar to sublimation in that it becomes one with the material you are applying it to, only requiring your Cricut machine and weeding to make the project happen.


You can use either the Cricut Infusible Ink sheets or the pens to design beautiful, personalized images that will then be permanently placed onto blanks. The sheets are Cricuts way to offer a sublimation option using just your machine creating professional, high quality and easy to make projects!
How to Use Infusible Ink
I was very nervous the first time I made an attempt with Cricut’s Infusible Ink, however, after just one project, I was hooked and now it is one of my favorite materials to use!I figured it would be very helpful to show how to use infusible ink with some step by step photos and a little project for you as well!

Supplies Need:
To start your project, make sure to gather your supplies. You will need:
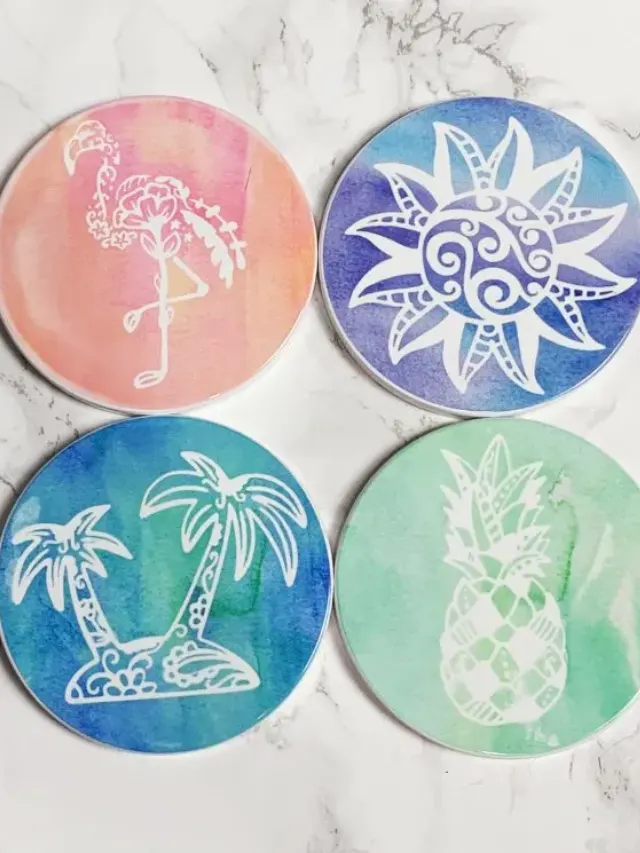
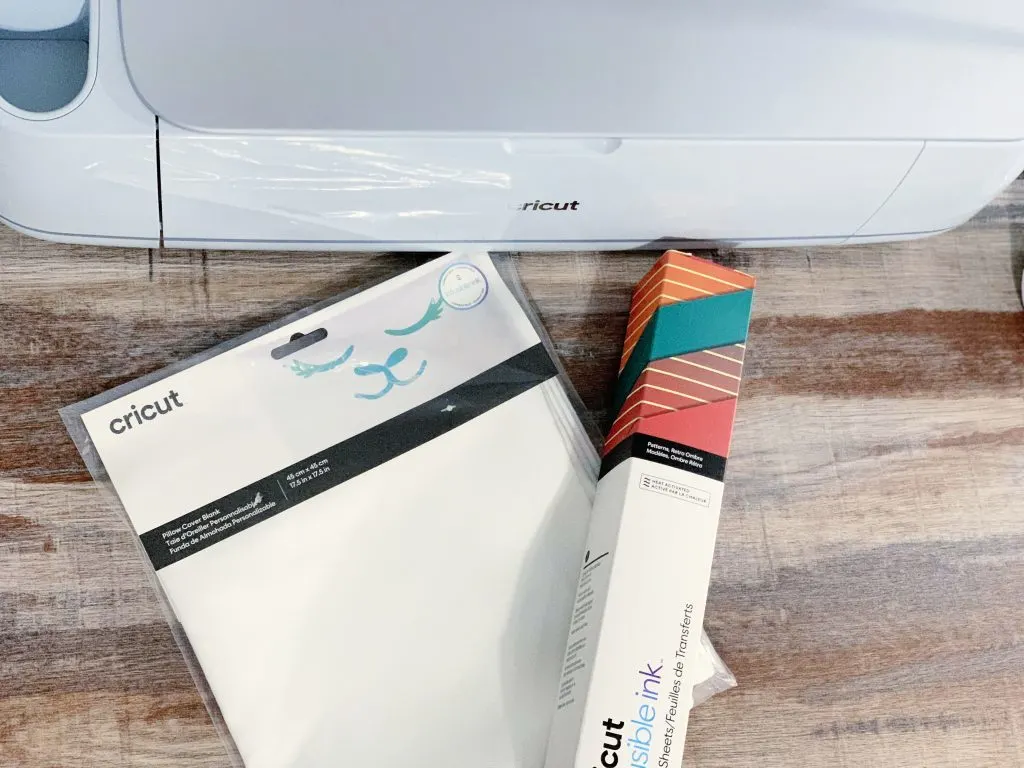
- Cricut Infusible Ink blanks of choice (they have pillows, coasters, shirts and more)!
- Cricut Infusible Ink sheets (I am using Retro Ombre)
- Cricut Maker 3 or Cricut Explore Air 2
- Cricut EasyPress 2
- EasyPress Mat
- Cricut Design Space
- Standard Grip Mat
- Cricut Weeding tools
- Optional supplies include Heat tape, Cricut Infusible Ink markers or pens, printable sublimation paper.
Steps on using Infusible Ink
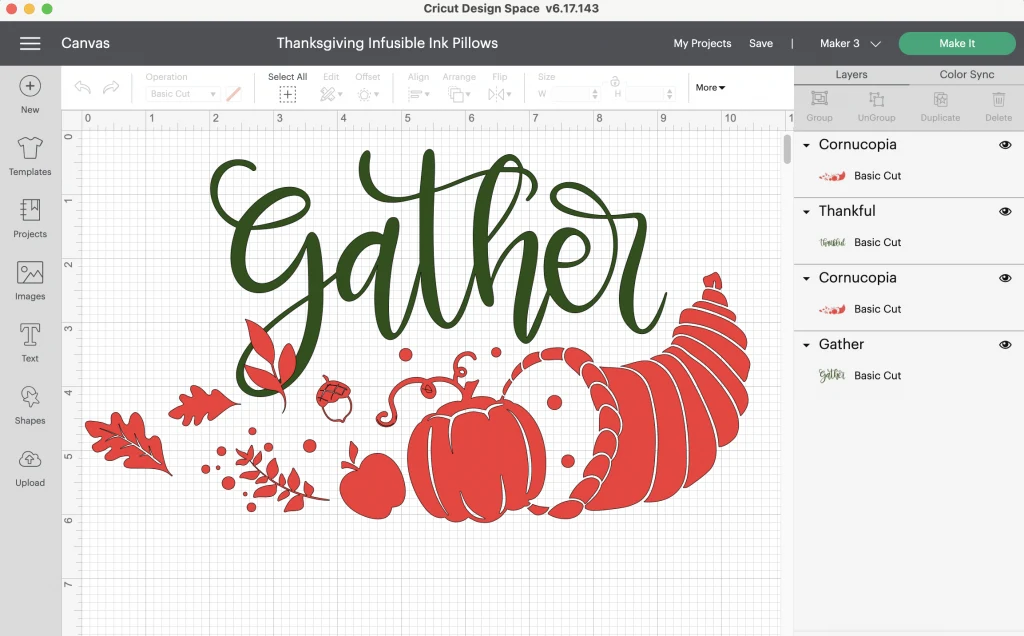
Start by designing your project in Cricut Design Space (You can grab my Gather and Thankful design for free here). Once you have your project designed, click “Make It” and follow the prompts on the screen to set up your mats and begin cutting out your project. Cricut does a fantastic job of walking users through and prompting them to load specific materials, mirror designs and check blades in machines.

When using the sheets, you will place them design side up on your mat and make sure to mirror the image. Once everything is set, you can then begin cutting the images out on your sheets using your Cricut machines.

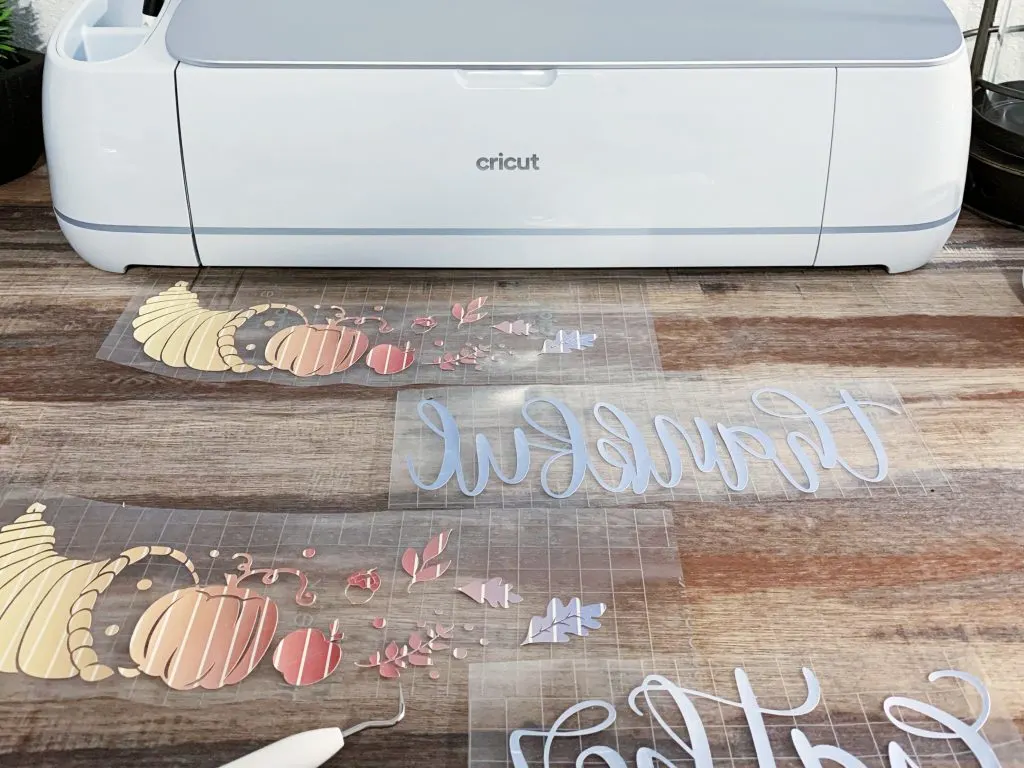
After the images are cut out of the sheets, you will need to weed the negative space using your cricut tools so that only your design is left on the transfer sheet. Infusible Ink sheets are THICK and I find that rolling the sheets a bit after I take them off the mat helps to “crack” the cuts and make it much easier to weed.


After everything is weeded, you can begin the process of transferring your design to your blank. In this case I am using Cricut’s pillow cases as my blank. You will want your EasyPress 2 to be set at 385º for 40 seconds. Start by first preheating the material for 15 seconds, by placing your blank onto the EasyPress mat, layering the butcher paper that comes with the sheets a top and then pressing the EasyPress 2.


Next place your transfer sheet face down on the blank (clear liner should be face up), place butcher paper back over the design and then press with the EasyPress 2 for 40 seconds. Do not move the EasyPress around as you would an iron, just firmly press to keep the design from moving around. Once the timer goes off, remove the EasyPress, allow the design to cool and then SLOWLY remove the butcher paper and the liner with the design.


Viola! You have now made a beautiful project that will last forever and can be personalized to any decor, holiday or special event…even just because! I hope this tutorial helped you learn how to use infusible ink and if you have any questions, feel free to drop them in the comments section!
Interested in more projects using infusible ink? Check out the projects below: