Halloween in this house means DIY. We are no stranger to DIY costumes in this house as we have made every costume that our kids have worn. Check out these DIY Five Nights at Freddy’s Baby and Golden Freddy costumes and learn how the Cricut Air Explore 2 and Cricut EasyPress made these a reality.
Disclosure: This is a sponsored conversation written by me on behalf of Cricut. The opinions and text are all mine.


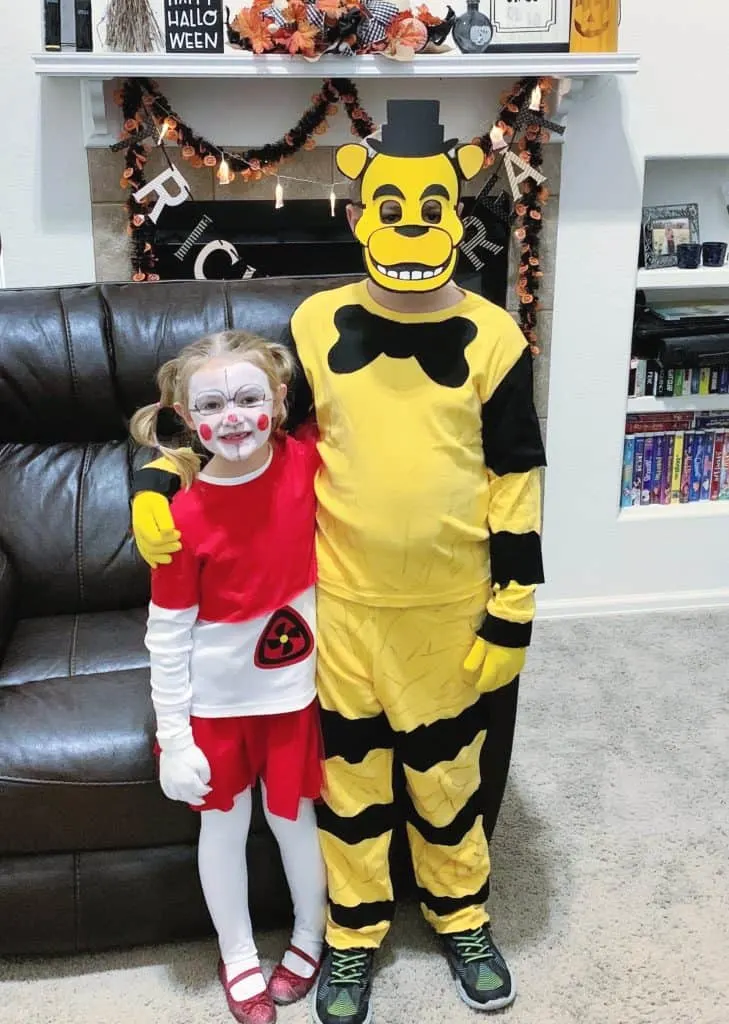
DIY Five Nights at Freddy’s Baby Costume
Making these costumes that my kids come up with can be very challenging. Often I have just a photo to go off and usually there is no pattern. This DIY Five Nights at Freddy’s Baby costume was much the same. I was able to gather most of the things I needed either in online stores or craft stores and get to work.
Baby Costume Items Needed
- White Long Sleeve Shirt
- Red long or short sleeve shirt
- White tights
- White gloves
- Red shoes
- Red fabric
- Red tulle fabric
- Elastic
- Skirt pattern
- Cricut Air Explore 2
- Cricut Everyday Iron On vinyl in red, black and yellow
- Cricut Easypress
- Face paint
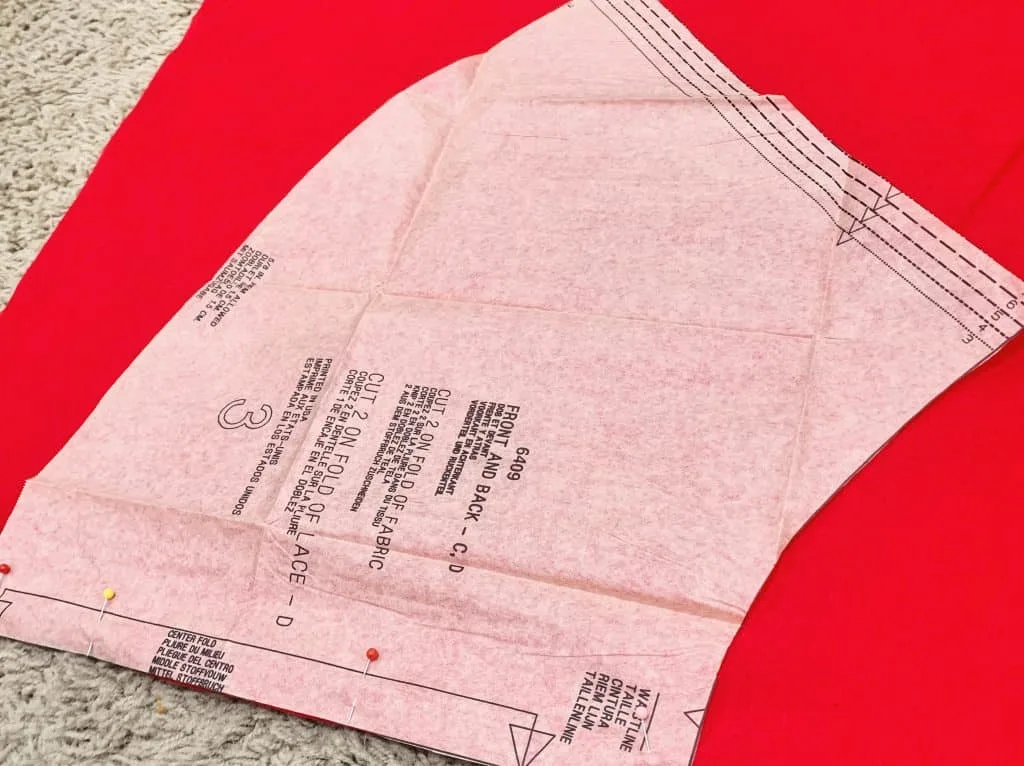
In starting to make your DIY Five Nights at Freddy’s Baby Costume, you will want to make the red skirt. I used New Look Pattern number 6409 to make the skirt. It took about an hour from start to finish and is a very simple pattern to follow. You may want to make it shorter than recommended to fit the look of the costume.

Once the skirt was completed, I took a plain red t-shirt and placed it on my daughter. I used a white crayon and marked where I wanted to cut the shirt so it sat just right on her as a “crop top”.


From there, I simply used some good fabric scissors and then cut the sleeves and bottom half of the shirt off. I then sewed some red tulle to the sleeve seam by hand, for the little shoulder flairs that Baby has (this is pictured later in the post).


Using the Cricut EasyPress
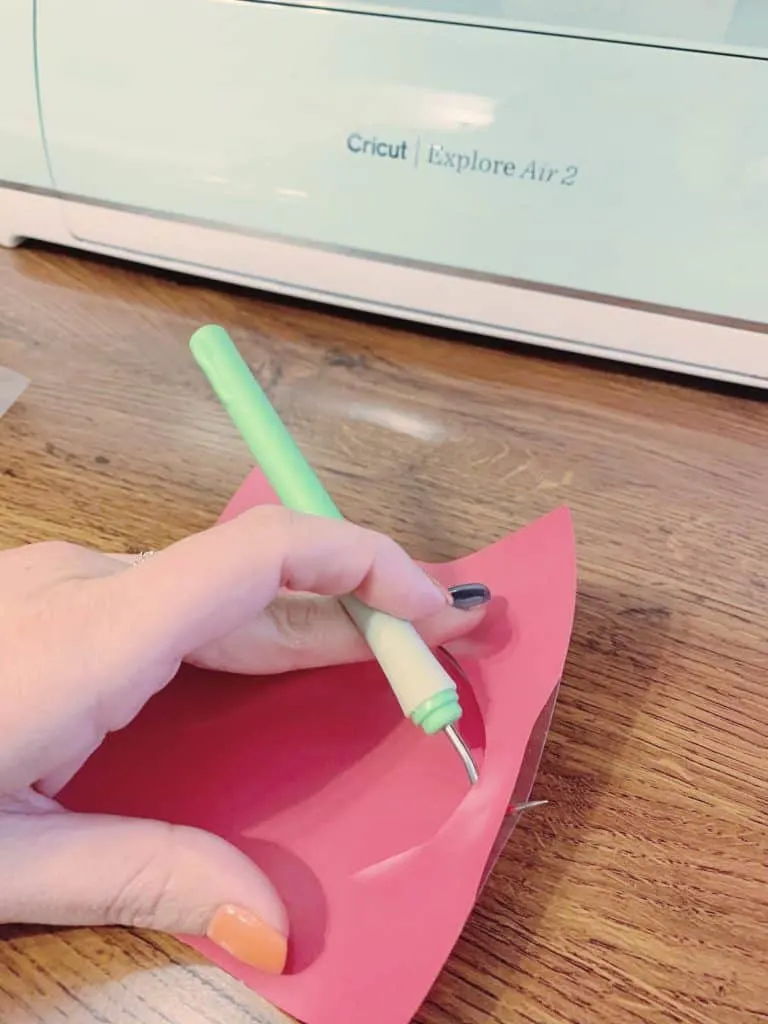
Once the skirt and shirt were made, I jumped onto Cricut Design Space and made the little fan symbol that is on the belly of Baby and then cut it out on Cricut Everyday Iron-On vinyl. I love how I can create the design in design space and then the software sets up the cuts for me, to save the most vinyl and space possible.


Using the Cricut Explore Air 2, I cut out each piece of the vinyl and then I used my Cricut weeding tool to remove the excess vinyl to prepare for placement. I have found that a good weeding tool is essential to these projects and I really like the sturdiness of this one.

While I was prepping the vinyl, I plugged in my new Cricut EasyPress to allow it to heat up and I laid out my Cricut EasyPress Mat. I really love this EasyPress and how quick and simple it is to use. It has an advanced heat plate design allowing edge-to edge even heat for transfers. Precise temperature control up to 400ºF and safety features like the insulated base and auto shutoff features.

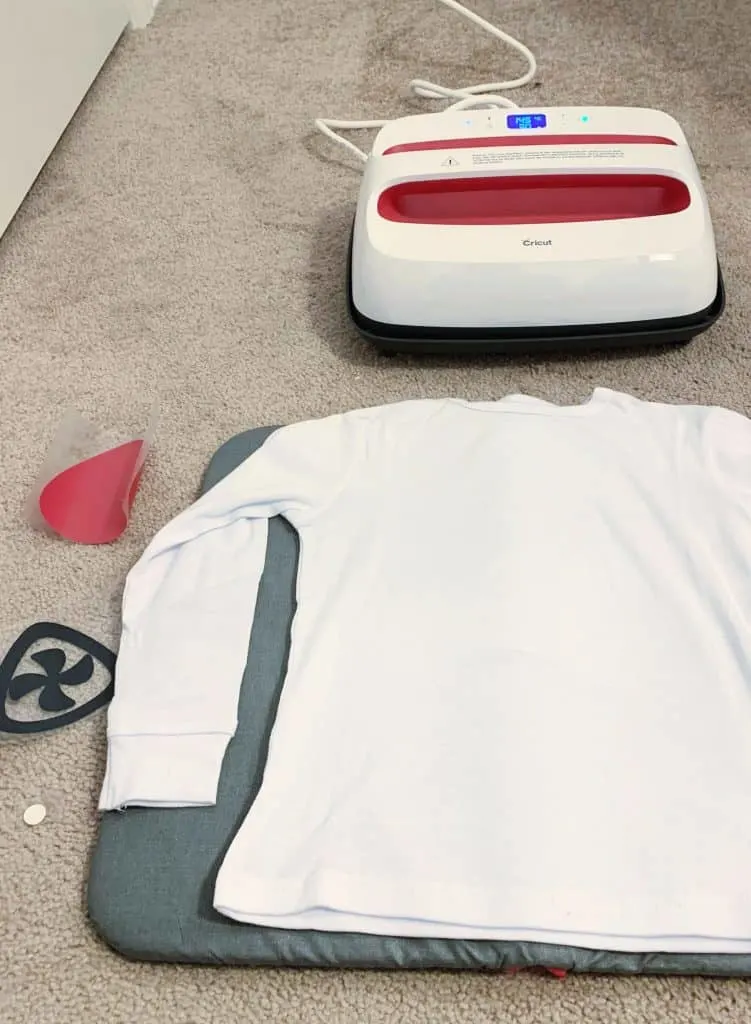
I laid out the white long sleeve shirt and then followed the Cricut EasyPress instructions to first heat the material. From there, I laid my first layer of vinyl down (the red triangle) and then applied the EasyPress as directed.


I repeated the process for the black fan layer as well as the yellow center circle layer and then allowed the shirt to cool completely. This was my first time using the Cricut EasyPress and I did learn that you need to allow the transfer a little time to cool before you take off the transfer sheet or you will get wrinkling in the design as you see below.


Once you have finished transferring your design, you can put the costume together. Grab some facepaint and throw that hair in pigtails and enjoy the adorable DIY Five Nights at Freddy’s Baby Costume.


Our daughter tends to follow our son in his interests. She actually does not like Five Nights at Freddy’s but she has taken a particular interest in Baby as my son has some action figures and this one is “pretty” to her. She looks adorable and was very excited to have that face painted to look like baby.
DIY Five Nights at Freddy’s Golden Freddy Costume
Of course, you can’t have Baby without Freddy. These animatronic characters are really complex, but thankfully the internet and cosplay have helped regular mom’s like me come up with a pretty awesome costume. Our son didn’t just want to be Freddy, he wanted to be Golden Freddy.
Golden Freddy Costume Items Needed
- Yellow long sleeve shirt
- Yellow Sweatpants
- Yellow gloves
- Black fabric
- Fabric glue
- Scissors
- Brown Fabric marker
- Cricut Air Explore 2 with deep cut blade
- Black, Yellow and White craft foam
- Elastic
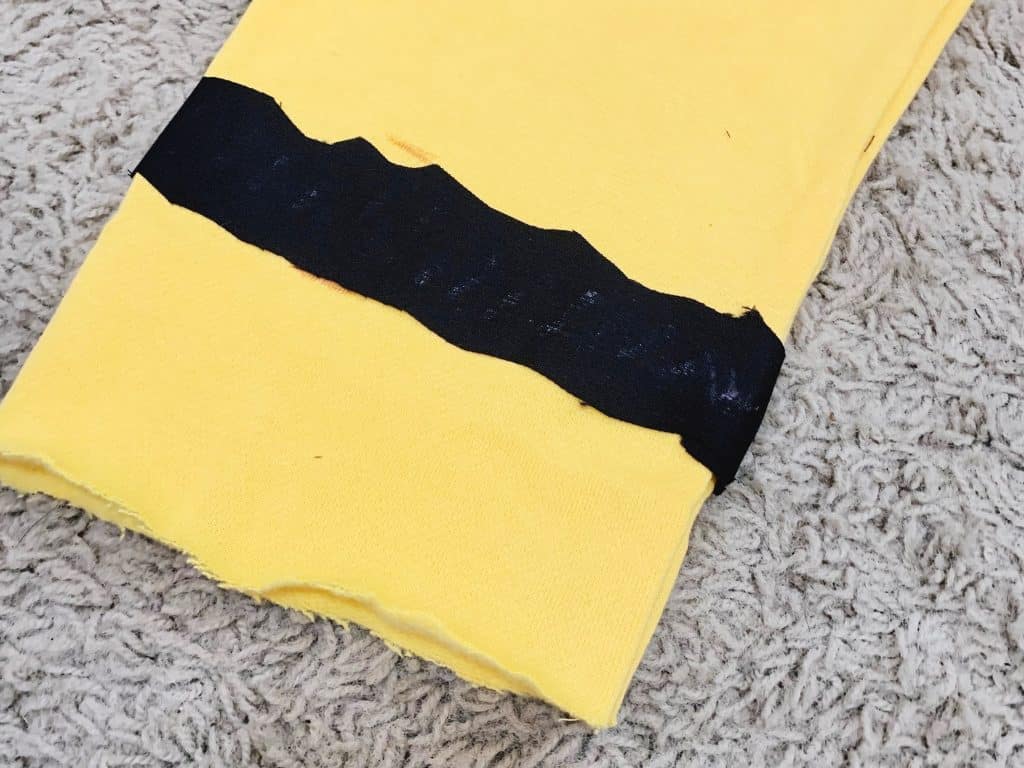
We live in Colorado, so all costumes are always made with winter in mind. This is why I almost always start with sweatshirts and pants in solid colors. I purchased a yellow set off Amazon and then bought some black cotton fabric to make the mechanical joints on Golden Freddy.


I would cut a strip of fabric, then place it over the arm or leg of the shirt to measure how much I needed. I allowed for about a 1 inch overlap on both ends. From there, I would use the scissors to rough up the black strip a bit to give it a torn look and then I would use permanent fabric glue to adhere the strip to the garment.
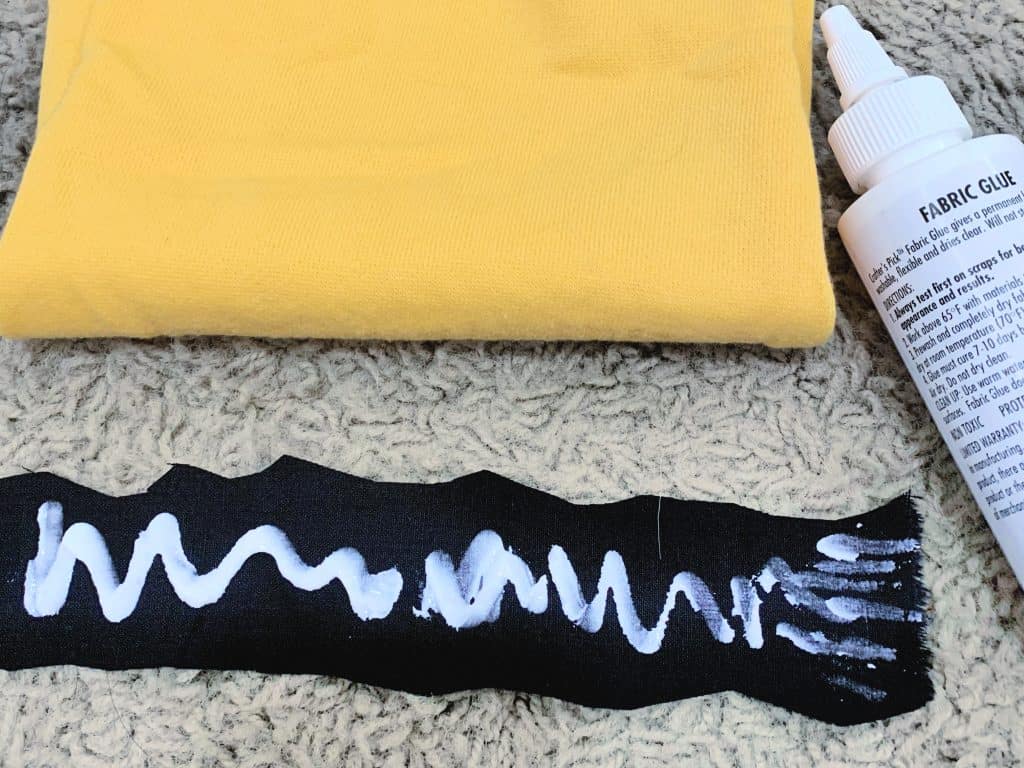

The fabric glue typically will go on white and then dry clear. Do not be worried if you can see the glue through the fabric. I will say, that you do want to make sure that the interior side of the fabric does not stick together. To do this, I used a piece of cardboard.

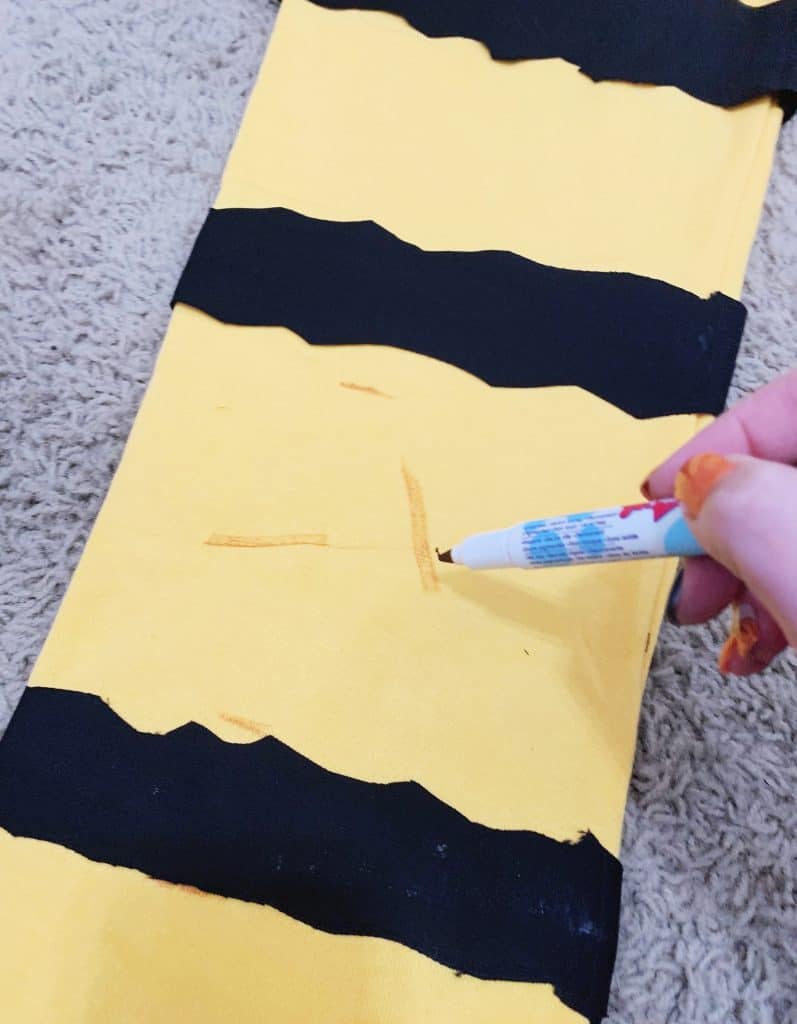
While the glue is drying, you can grab your brown fabric marker and go to work, making scratch marks all over the yellow space on the shirt and pants. Golden Freddy is a mess, so it is ok to go a little crazy here.

Making the Foam Mask with Cricut
I have to admit, I am struggling to really create my own designs in the Cricut Design Space. I often have to design the image in a separate program, then export it as an SVG and then upload it to Cricut Design Space. The Golden Freddy mask was no exception, but once in, I was able to get every element loaded and then being the cutting process.


I loved that with my Cricut Air Explore 2, I could put in the deep cut blade, set the settings for craft foam and allow the machine to cut out my design pretty much as I had imagined. I will say that with the foam setting it does make several of the same cuts over and over to ensure that the foam is cut precisely.


You can see the jagged edges on the pieces above. I think as I get better with Cricut Design Space, I will be able to smooth those out better, but for now, they are so minimal that I just left them. I used fabric glue to paste all the foam pieces together. I did find that it did not dry as quick and that super glue also worked great to keep the pieces together.

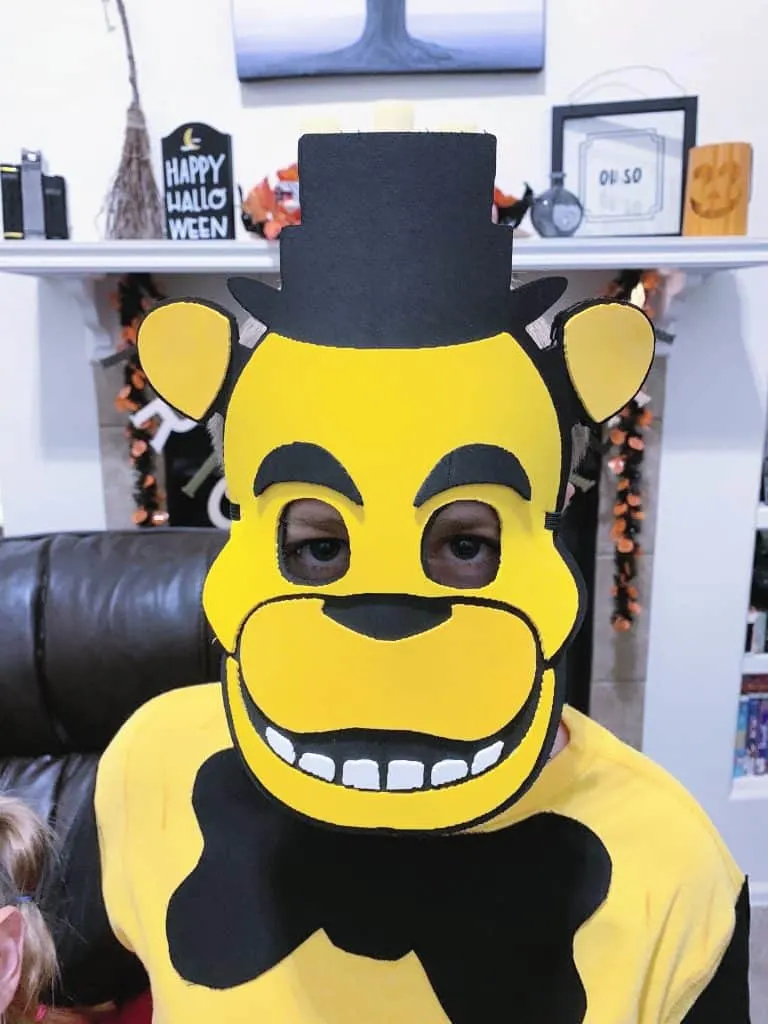
Once the mask was put together, I used a thin elastic to carefully thread through the layers of the mask and hold it on his head. You guys, for my first foam project, this turned out incredibly well and my son is ecstatic to share this with his friends this week.
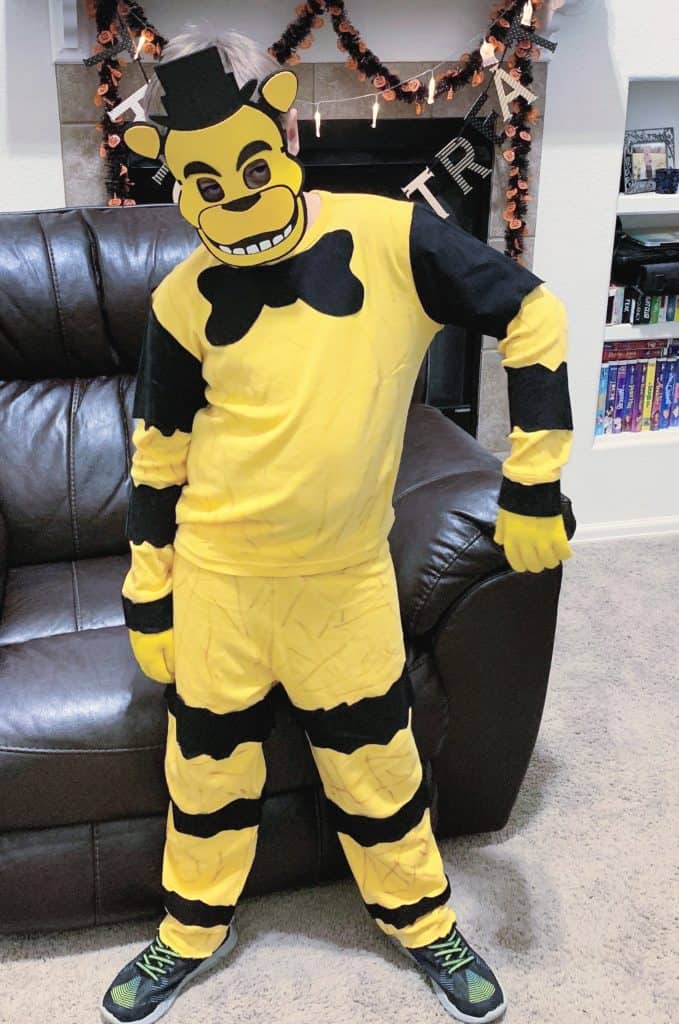

The entire costume came together so well looks really good. My son has always given us some doozies, but in general he is a go with the flow kinda kid and loves that his mama takes the time to make him a unique costume that no one else will have.
DIY Five Nights at Freddy’s Baby and Golden Freddy Costumes
I am really proud of how these turned out. I have to admit that I was very nervous going into this, but that as I began working the tasks were much less daunting. It took me just under 6 hours total to finish both costumes and it would not have been possible without my Cricut Air Explore 2 and Cricut EasyPress.

Those machines are so versatile and make DIYing anything really simple. I love how unique the costumes are and honestly am sure they will be a big hit at the kids school parties this year. Now let’s hope that they are both healthy, because our track record for HallowSickness is strong.


Howdy, Partner
Saturday 4th of July 2020
This is a horror game, why are you ok with your kids dressing up as these characters?? The game’s story is about a murderer killing children and stuffing their bodies into animatronics, which causes the animatronics to want to murder the player. That kind of content is not ok for kids.
Laura
Monday 6th of July 2020
My kids have a biology teacher as a mom. They know real from fake, they know special effects, they understand the value of actual human life and they like the characters. They do not play FNAF anyway because they prefer super mario, but they have friends at school that like to pretend and so I made them into the characters they pretend with friends at school. Move along.